
How Many T-Shirts Do You REALLY Need for a Quilt?
One of the very first questions people ask when starting a T-shirt quilt is:
“How many shirts do I actually need?”
And honestly?
It’s a great question.
Because most people begin with either:
a giant pile of shirts and no plan…
oronly a few treasured shirts and worry there won’t be enough.
The truth is:
There isn’t one perfect number.
The number of shirts you need depends on:
the size of quilt you want
the layout style you choose
the size of the graphics on the shirts
whether you use sashing or borders
and how much flexibility you want in your design
This is exactly why I encourage quilters to plan before cutting.
Because once you understand the layout possibilities, the shirt pile suddenly feels much less overwhelming.
First: Bigger Graphics Need Bigger Blocks 👕
One thing many beginners don’t realize is that not all T-shirts are created equally.
Some shirts have:
small chest logos
narrow vertical graphics
oversized full-front designs
back graphics
sleeve details
This matters because the graphic size affects:
block size
layout flexibility
finished quilt dimensions
For example:
a large concert shirt graphic may need a 15" block
a smaller logo may work beautifully in a 12" block
some shirts may need framing or filler fabric to balance the layout
This is why counting shirts alone is not enough.
You’re really planning:
graphics + layout + size together
General T-Shirt Quilt Size Estimates 📏
While every quilt is unique, these estimates are a helpful starting point.
Lap Quilt
Approximate Size:
45" x 60"
Estimated Shirts:
9–12 shirts
Best For:
memory quilts
couch quilts
smaller collections
gifts
Throw Quilt
Approximate Size:
55" x 70"
Estimated Shirts:
12–20 shirts
Best For:
graduation quilts
everyday use
balanced layout flexibility
Twin Size Quilt
Approximate Size:
65" x 85"
Estimated Shirts:
20–30 shirts
Best For:
dorm rooms
teen memory quilts
larger collections
Full/Queen Size Quilt
Approximate Size:
80" x 90"+
Estimated Shirts:
30–45+ shirts
Best For:
large memory collections
legacy quilts
extensive sports or school collections
The Layout You Choose Changes EVERYTHING 🧵
This is one of the biggest reasons I recommend planning before cutting.
Different layouts use shirts very differently.
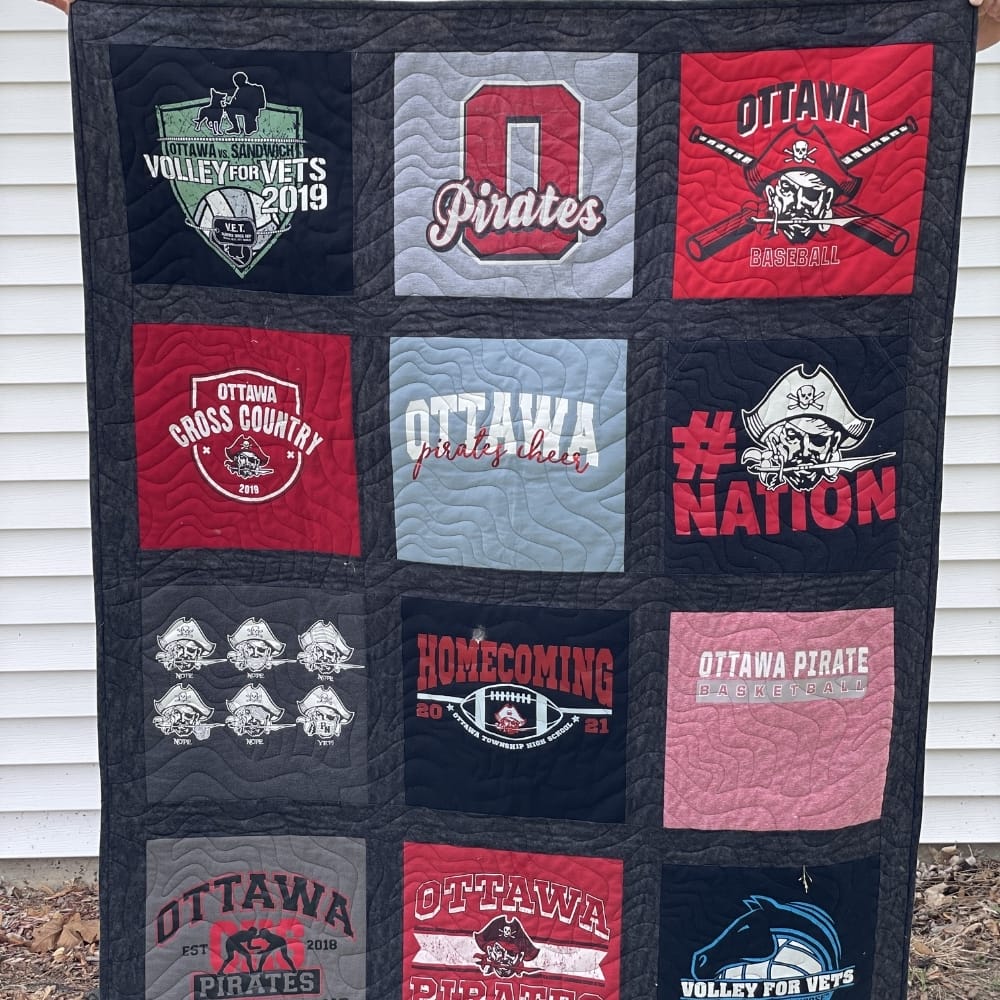
Uniform Grid Layouts
These layouts use blocks that are all the same size.
They are:
beginner friendly
structured
clean looking
easier to piece
This is the style used in my:
Uniform layouts work beautifully when:
graphics are similar in size
you want a calm, organized appearance
you are newer to T-shirt quilting
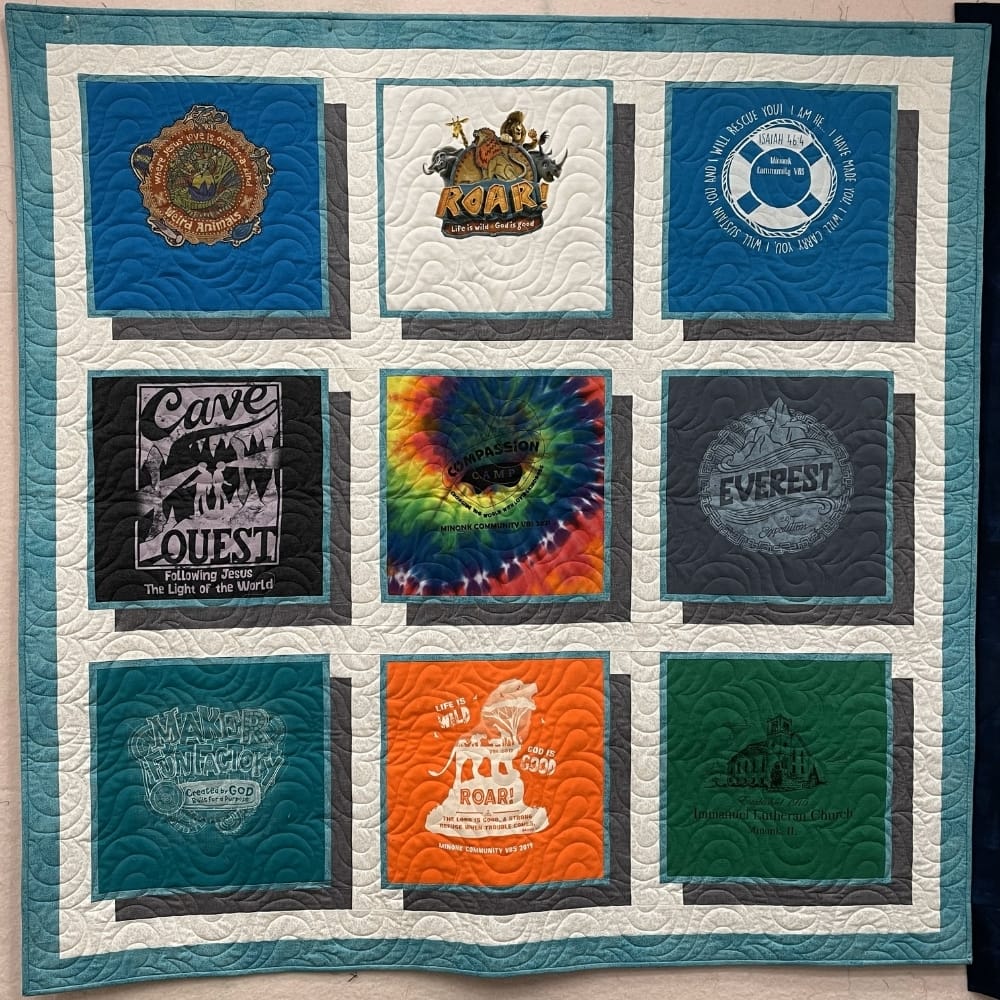
Framed Layouts
Framed layouts allow more flexibility with graphic sizes.
This is the approach used in:
These layouts help:
balance oversized graphics
create visual movement
accommodate different shirt sizes more easily
They’re especially helpful when:
shirt graphics vary significantly
you want a more dynamic design
you have a mix of front and back graphics
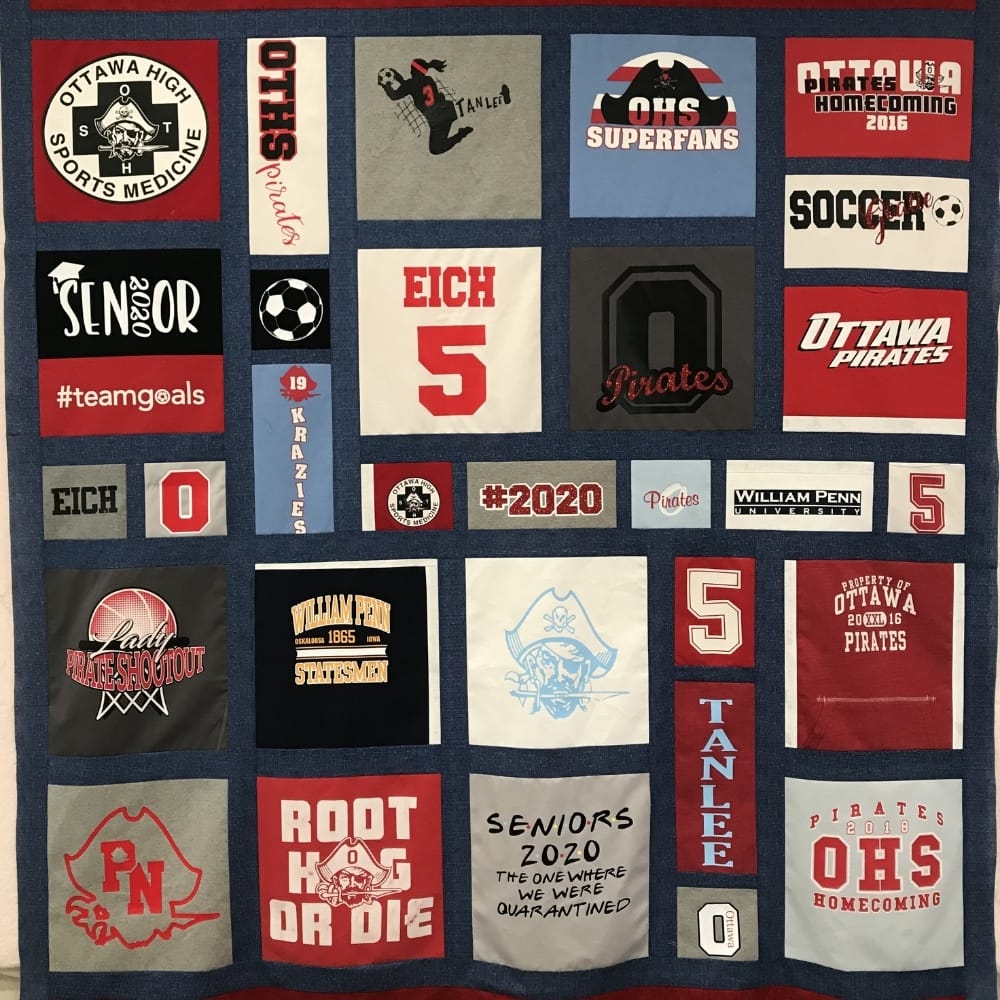
Multi-Size or Custom Layouts
Some quilts combine:
multiple block sizes
filler fabrics
memory items
photos or embroidery
specialty blocks
These quilts often require more planning but can create beautifully personalized results.
And this is exactly why cutting too early can create problems later.
One of the Biggest Mistakes? Cutting Before Planning ✂️
I completely understand the excitement of wanting to start.
But one of the most common frustrations in T-shirt quilting happens when shirts are cut before:
the quilt size is decided
the layout is planned
the graphic sizes are evaluated
Once fabric is removed…
it cannot be added back.
Planning first helps protect your flexibility.
And honestly?
Planning usually reduces stress dramatically.
Because instead of guessing…
you’re making intentional decisions.
Planning counts as progress.
What If You Don’t Have Enough Shirts?
This is another very common concern.
And the good news is:
you have more options than you think.
You can:
add borders
use sashing
include back graphics
combine fronts and backs
add fabric blocks
incorporate photos or embroidery
use pieced filler sections
create pillow shams or matching projects
Sometimes a smaller, meaningful quilt is even more powerful than trying to stretch a design too far.
There’s no “right” number of shirts.
There’s only the quilt that tells your story best.
What If You Have TOO Many Shirts?
Also very common. 😊
When there are more shirts than the quilt can reasonably hold, try:
selecting the most meaningful graphics
focusing on a theme
creating multiple quilts
making a front-focused quilt and a back-focused quilt
sorting into YES / MAYBE / NO piles
Not every shirt has to fit into one quilt.
And not every memory has to be carried in the exact same way.
Before You Start Cutting…
Take a breath first.
Lay the shirts out.
Look at the graphics.
Think about the purpose of the quilt.
Consider how you want it to feel when it’s finished.
The planning stage is not wasted time.
It’s part of the quilt.
And often, it’s the stage that creates the most confidence moving forward.
Ready to Start Planning Your Quilt?
If you’re trying to figure out:
how many shirts you need
what layout works best
how to organize your design
or where to even begin…
I’d love to help guide you through the process.
A planning-first guide designed to help you confidently move from pile of shirts → clear quilt plan.
You can also explore my beginner-friendly quilt patterns:
🧵 12 Patch Pattern
Perfect for uniform layouts and structured designs.
🧵 In The Shadows Pattern
Ideal for framed layouts and mixed-size graphics.
Because the goal isn’t just to use the shirts.
The goal is to create a quilt that feels meaningful, balanced, and beautifully finished.

I'm Trisha
My quilting journey began when I was stationed overseas with the U.S. Navy and received a handmade quilt from my grandfather. That simple but powerful gift wrapped me in love during one of the most distant and challenging seasons of my life—and it left an imprint on my heart forever.
Let's Be Social



Snag my Freebie
Get Prepped for Longarming
Make sure your quilt is ready for professional quilting by prepping it properly.
Join the Club!
Join my free private Skool Community for inspiration, tips, and community support as you learn to t-shirt quilt from start to finish.

Let's Be Social
Professional Longarm Quilting, Memory Quilts, and DIY Courses
View Some More
©2025 Mitered Corner Quilting | Designed By Zestful Media & Design